Imagine biting into a warm Marble Cookie, where the rich chocolate swirls dance with buttery vanilla dough, creating a delightful explosion of flavors that tickle your taste buds. The aroma wafts through the kitchen, inviting you to indulge in a treat that’s as visually stunning as it is delicious—perfect for cozy afternoons or festive gatherings.
As I reminisce about baking these cookies with my grandmother, her laughter mixed with the clinking of mixing bowls fills my heart with warmth. Marble Cookies are more than just a sweet indulgence; they embody the joy of sharing and creating memories over a batch baked with love. Whether it’s a rainy day or a holiday celebration, these cookies promise an unforgettable experience that will leave you craving more.
Why are Marble Cookies so irresistible?
Delightfully unique in appearance, these cookies combine rich chocolate and vanilla flavors for a stunning visual treat. Super easy to make, even novice bakers can whip these up in no time! Versatile enough to customize with your favorite add-ins, they’re perfect for any occasion. Crowd-pleasing, these cookies disappear fast at parties and gatherings. Enjoy a deliciously sweet moment without the fuss!
Marble Cookies Ingredients
For the Cookie Base
- Unsalted butter – this adds richness and a tender texture to your cookies.
- Granulated sugar – for that perfect balance of sweetness in every bite.
- Brown sugar – gives a hint of caramel flavor and keeps the cookies moist.
- Eggs – help bind the ingredients together, ensuring a soft, chewy texture.
- Vanilla extract – enhances the overall flavor profile, making those Marble Cookies irresistible.
- All-purpose flour – the foundation of your cookie dough; feel free to substitute with gluten-free flour if needed.
- Baking soda – ensures your cookies rise beautifully and achieve that perfect softness.
- Salt – a crucial ingredient that brightens all the flavors.
For the Chocolate Swirl
- Cocoa powder – brings deep chocolate flavor to create those beautiful marbled patterns.
- Semi-sweet chocolate chips – for an extra burst of chocolate goodness in each bite; you can use dark chocolate for a richer taste.
These ingredients work together to create delightful Marble Cookies that are sure to become a family favorite!
How to Make Marble Cookies
1. Preheat your oven to 350°F (175°C). This step is crucial for ensuring your Marble Cookies bake evenly and achieve that delightful golden brown color.
2. Mix the dry ingredients in a bowl. Combine flour, baking soda, and a pinch of salt, whisking them together until well blended for a consistent texture throughout your cookie dough.
3. Cream the butter and sugars together in a large mixing bowl. Beat them until light and fluffy, which should take about 3-5 minutes, infusing your kitchen with sweet aromas.
4. Add the eggs and vanilla extract. Mix until fully incorporated, enjoying the way the mixture becomes rich and creamy—this is where the magic begins for your Marble Cookies!
5. Combine the dry ingredients with the wet mixture gradually. Stir gently to avoid overmixing; you want to maintain that soft texture that’s perfect for marbleizing.
6. Divide the dough into two bowls. In one bowl, mix in cocoa powder for that luscious chocolate swirl, keeping the other bowl plain for contrast—this creates the marbled effect!
7. Scoop alternating spoonfuls of both doughs onto a baking sheet lined with parchment paper. Use a tablespoon to create lovely dollops that will form beautiful marbles once baked.
8. Swirl the dough lightly with a knife or toothpick. This step is essential for achieving that stunning marbled appearance; don’t overdo it—just a few swirls will do!
9. Bake in your preheated oven for 10-12 minutes. Keep an eye on them; they should be set but still soft in the center when done—perfectly chewy!
10. Cool on a wire rack for at least 5 minutes before transferring them to enjoy their full flavor and texture.
Optional: Dust with powdered sugar before serving for an extra touch of sweetness!
Exact quantities are listed in the recipe card below.
Tips for the Best Marble Cookies
- Chill the Dough: Allow your dough to chill for at least 30 minutes. This prevents spreading and helps achieve that perfect marbled effect.
- Swirl Technique: Use a knife or skewer to gently swirl the chocolate into the dough. Avoid overmixing; you want distinct marble patterns, not solid brown!
- Quality Ingredients: Choose high-quality cocoa powder and chocolate. The flavor of your marble cookies will shine through with good ingredients.
- Baking Time: Keep an eye on your cookies in the oven. They should be set around the edges but still soft in the center for that delightful chewy texture.
- Storage Tips: Store your marble cookies in an airtight container at room temperature. They’ll stay fresh and delicious for up to a week!
How to Store and Freeze Marble Cookies

- Room Temperature: Keep your marble cookies in an airtight container at room temperature for up to 3 days. This helps maintain their delightful texture and flavor!
- Fridge: If you want to extend their freshness, store the cookies in the fridge for up to a week. Just be sure to seal them tightly to avoid drying out.
- Freezer: For longer storage, freeze your marble cookies in a single layer on a baking sheet, then transfer them to a freezer-safe bag for up to 3 months. Thaw at room temperature when you’re ready to enjoy!
- Reheating: To refresh chilled or frozen marble cookies, pop them in a preheated oven at 350°F (175°C) for about 5 minutes. This will bring back their warm, gooey goodness!
Marble Cookies: Delicious Twists
Customize your marble cookies to suit your taste and dietary needs, creating a delightful experience with every bite!
- Gluten-Free: Substitute all-purpose flour with a gluten-free blend for a tender and chewy texture everyone can enjoy. It’s an effortless way to share the love without the gluten!
- Nut-Free: Use sunflower seed butter instead of peanut or almond butter to keep it safe for nut allergies. These cookies will still be rich and satisfying!
- Vegan: Replace eggs with flaxseed meal mixed with water and use dairy-free chocolate chips for a plant-based treat. You won’t miss the eggs; the flavors shine through beautifully.
- Chocolate Boost: Add an extra 1/2 cup of cocoa powder for an intense chocolatey flavor that will make any chocolate lover swoon. The result? A decadent cookie experience that’s hard to resist!
- Spicy Kick: Mix in a pinch of cayenne pepper or cinnamon for a surprising warmth that elevates the flavor profile. This unique twist adds depth and intrigue to every bite.
- Fruit Infusion: Fold in dried cherries or cranberries for a sweet-tart contrast that brightens the overall flavor. It’s like bringing a touch of summer into your kitchen!
- Caramel Drizzle: Top your cookies with melted caramel sauce for a luscious finish that takes these treats to another level. Each bite is an indulgent surprise wrapped in sweetness!
Make Ahead Options
If you’re looking to streamline your baking process, these Marble Cookies are perfect for meal prep! You can prepare the dough up to 24 hours in advance and keep it chilled in the refrigerator. Simply combine your butter, sugars, and eggs as per the recipe, then swirl in the chocolate and vanilla doughs. Once formed into logs, wrap them tightly in plastic wrap. For longer storage, you can freeze the rolled dough for up to 3 months. When you’re ready to bake, just slice the frozen logs into rounds and pop them straight into the oven without thawing—this will keep your cookies deliciously chewy! Just remember to adjust the baking time slightly if they’re still frozen, ensuring each bite of your Marble Cookies is a delight!
Marble Cookies Recipe FAQs
What type of chocolate is best for marble cookies?
For the best flavor, I recommend using high-quality semi-sweet and white chocolate chips. They melt beautifully and create that gorgeous marbled effect. If you prefer a sweeter cookie, you can swap in milk chocolate chips.
How should I store my marble cookies?
To keep your marble cookies fresh, store them in an airtight container at room temperature. They’ll stay delicious for about 5-7 days. For longer-lasting freshness, consider placing parchment paper between layers to prevent sticking.
Can I freeze marble cookies?
Absolutely! You can freeze baked marble cookies for up to 3 months. Just ensure they are completely cooled before wrapping them tightly in plastic wrap or aluminum foil and placing them in a freezer-safe bag. When you’re ready to enjoy them, let them thaw at room temperature for about an hour.
What should I do if my dough is too sticky?
If your marble cookie dough feels too sticky to handle, don’t worry! This can happen if your butter is too warm or if you added a bit too much liquid. Simply sprinkle a little bit of flour onto your work surface and on your hands while shaping the dough. Alternatively, chill the dough in the refrigerator for 30 minutes to make it easier to work with.
Are there any dietary substitutions I can make for marble cookies?
Yes! If you’re looking for a gluten-free version, substitute all-purpose flour with a gluten-free blend, ensuring it has xanthan gum included for proper structure. For dairy-free options, use coconut oil instead of butter and dairy-free chocolate chips. These swaps maintain the deliciousness while catering to dietary needs!
Can I add different flavors or mix-ins to my marble cookies?
Definitely! Marble cookies are versatile and can be personalized. Consider adding nuts like pecans or walnuts for crunch, or swirl in some caramel sauce along with the chocolate for an extra treat. Just remember that too many add-ins can alter the texture, so keep it balanced!
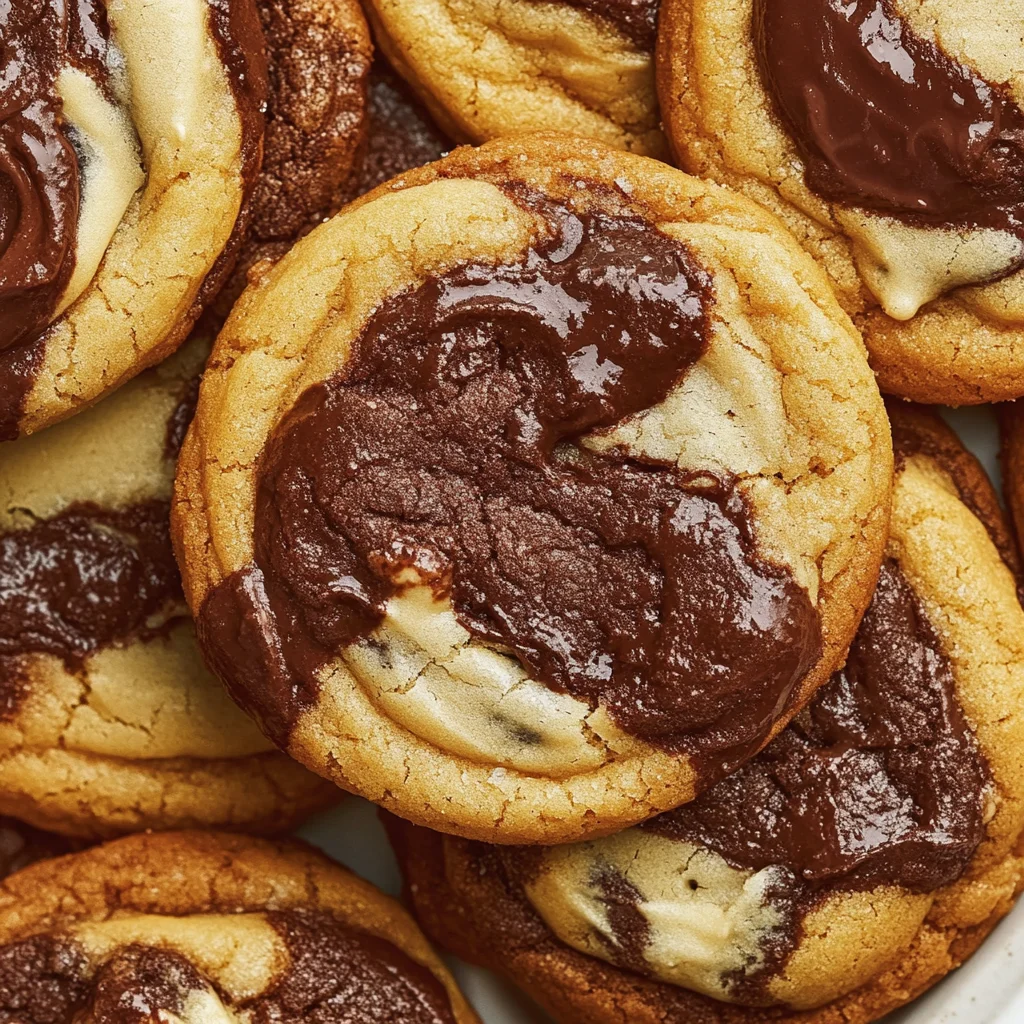
Marble Cookies
Ingredients
Method
- Preheat your oven to 350°F (175°C).
- Mix the dry ingredients in a bowl: combine flour, baking soda, and salt.
- Cream the butter and sugars together until light and fluffy (about 3-5 minutes).
- Add the eggs and vanilla extract, mixing until fully incorporated.
- Combine the dry ingredients with the wet mixture gradually, stirring gently.
- Divide the dough into two bowls; mix cocoa powder into one for the chocolate swirl.
- Scoop alternating spoonfuls of both doughs onto a baking sheet lined with parchment paper.
- Swirl the dough lightly with a knife or toothpick.
- Bake in the preheated oven for 10-12 minutes until set but still soft in the center.
- Cool on a wire rack for at least 5 minutes before transferring.


