Imagine biting into a Marble Cookie, where the rich, buttery dough swirls with decadent chocolate, creating a delightful dance of flavors that makes your taste buds sing. The aroma wafts through the air like a warm hug, inviting you to savor each crumb as it melts in your mouth, leaving behind a blissful combination of sweetness and nostalgia.
These Marble Cookies are the perfect companion for cozy afternoons or festive gatherings, evoking memories of baking with loved ones in the kitchen. With every bite, you’ll experience that irresistible blend of textures—crispy edges giving way to chewy centers—that keeps you coming back for more. Get ready to indulge in this flavor sensation that promises to bring joy to any occasion!
Why are Marble Cookies a must-try?
Delightful flavor combinations create a perfect blend of chocolate and vanilla that will tantalize your taste buds. Easy to make, these cookies come together quickly, making them ideal for busy bakers. Versatile by nature, you can customize them with your favorite add-ins. Crowd-pleasing, they’re sure to impress at any gathering!
Marble Cookies Ingredients
For the Cookie Dough
- All-purpose flour – a foundational ingredient that gives structure to your marble cookies.
- Unsalted butter – ensures a rich flavor; make sure it’s softened for easy mixing.
- Granulated sugar – adds sweetness and helps create that perfect, tender texture.
- Brown sugar – lends a subtle caramel flavor and moisture to the dough.
- Eggs – act as a binding agent; use room temperature eggs for better incorporation.
- Vanilla extract – enhances the overall flavor profile of your marble cookies.
- Baking soda – helps the cookies rise and achieve that delightful softness.
- Salt – balances the sweetness and elevates all the flavors in your cookie dough.
For the Chocolate Swirl
- Cocoa powder – essential for that rich chocolate taste; Dutch-processed works best for depth of flavor.
- Chocolate chips – add melty pockets of chocolate goodness; choose dark or semi-sweet based on your preference.
Feel free to mix and match these ingredients to create a unique twist on classic marble cookies!
How to Make Marble Cookies
1. Preheat your oven to 350°F (175°C). This step is crucial for ensuring your cookies bake evenly and achieve that delightful golden brown color.
2. Mix the dry ingredients in a bowl. Combine flour, baking soda, and salt, whisking until well blended. This helps to distribute the leavening evenly throughout the batter.
3. Cream the butter and sugars together in a separate mixing bowl. Beat until light and fluffy, about 3-4 minutes. The texture should be airy and pale—this creates a lovely base for your marble cookies.
4. Add the eggs and vanilla extract. Mix until fully incorporated, ensuring everything is smooth and creamy, which adds richness to your cookie dough.
5. Combine the dry ingredients with the wet mixture gradually. Stir until just combined; be careful not to overmix! The dough should be thick but soft, ready for marbling.
6. Divide the dough into two bowls. In one bowl, fold in cocoa powder to create a rich chocolate flavor while keeping one portion as classic vanilla.
7. Scoop alternating spoonfuls of each dough onto a lined baking sheet. Use about 1 tablespoon per scoop for even-sized cookies that will bake uniformly.
8. Swirl a toothpick or knife through the scoops to create beautiful marble patterns without fully blending them together—this is where the magic happens!
9. Bake in the preheated oven for 10-12 minutes or until edges are set but centers remain soft. They’ll continue to firm up as they cool on the baking sheet.
Optional: Dust with powdered sugar before serving for an added touch of sweetness!
Exact quantities are listed in the recipe card below.
Tips for the Best Marble Cookies
- Chill the Dough: Allow your dough to chill for at least 30 minutes. This helps maintain its shape while baking and prevents spreading.
- Swirl Carefully: When marbling, use a gentle hand. Overmixing can lead to a muddy appearance instead of beautiful swirls in your marble cookies.
- Quality Ingredients: Use high-quality chocolate and fresh butter. The flavor of your marble cookies will shine through when you choose the best ingredients.
- Watch the Bake Time: Keep a close eye on your cookies as they bake. Remove them from the oven when the edges are golden but the centers are still soft for chewy perfection.
- Storage Tips: Store in an airtight container at room temperature for up to a week. This keeps your marble cookies deliciously soft and fresh!
How to Store and Freeze Marble Cookies

- Room Temperature: Keep your marble cookies in an airtight container at room temperature for up to 3 days to maintain their delightful texture and flavor.
- Fridge: For longer freshness, store your marble cookies in the fridge. They can last up to a week when sealed properly.
- Freezer: To enjoy your marble cookies later, freeze them in a single layer on a baking sheet, then transfer to an airtight container for up to 3 months.
- Reheating: When you’re ready to indulge, simply thaw the cookies at room temperature or warm them in the oven at 350°F (175°C) for about 5 minutes.
Marble Cookies: Delightful Twists
Customize these delightful treats to match your cravings and dietary needs for a truly unique experience!
- Dairy-Free: Substitute regular butter with coconut oil or vegan butter for a creamy, plant-based option. These cookies will still be rich and satisfying without the dairy.
- Gluten-Free: Use a 1:1 gluten-free flour blend to make this recipe accessible for everyone while maintaining that delicious texture. The result is just as enjoyable and perfect for sensitive tummies.
- Nutty Flavor: Add chopped nuts like walnuts or pecans to the dough for an extra crunch and earthy flavor. This twist adds delightful contrast to the soft cookie base.
- Chocolate Lovers: Fold in chocolate chips along with the marble mixture for an indulgent treat. Each bite will have pockets of gooey chocolate, making it irresistible.
- Spicy Kick: Incorporate a pinch of cayenne pepper or cinnamon into the dough for a warm, surprising twist. The hint of spice enhances the sweet flavors beautifully.
- Fruit Infusion: Mix in dried fruits like cranberries or cherries for a tart pop against the cookie’s sweetness. This variation adds not only flavor but also vibrant color to your batch.
- Zesty Citrus: Grate some lemon or orange zest into the dough for a fresh, zesty aroma. The citrus brightness complements the rich chocolate perfectly.
- Soft & Chewy: Increase brown sugar slightly to enhance chewiness, making your cookies even more tender and delightful. A twist on texture that everyone will love!
Make Ahead Options
If you’re looking to save time while still indulging in the delightful taste of marble cookies, this recipe is perfect for meal prep! You can prepare the dough up to 24 hours in advance; simply wrap it tightly in plastic wrap and store it in the refrigerator. For longer storage, freeze the dough for up to 3 months—just be sure to label it with the date. When you’re ready to bake, let the dough thaw in the fridge overnight before rolling it out. To maintain that rich flavor and texture, avoid overmixing when combining the chocolate and vanilla doughs. With these make-ahead options, you’ll have warm, freshly baked marble cookies ready in no time!
Marble Cookies Recipe FAQs
What kind of chocolate should I use for marble cookies?
For the best flavor and texture, I recommend using semi-sweet chocolate chips or a high-quality baking chocolate. If you prefer a richer taste, dark chocolate works beautifully too! Just make sure to melt it gently so it stays smooth and easy to swirl into your cookie dough.
How should I store my marble cookies?
To keep your marble cookies fresh, store them in an airtight container at room temperature. They can last about 5 days this way. If you want to keep them longer, consider refrigerating them, which can extend their shelf life to about a week while maintaining their chewy texture.
Can I freeze marble cookies?
Absolutely! Freezing is a great way to enjoy your marble cookies later. Allow the cookies to cool completely, then place them in a single layer on a baking sheet until frozen solid. After that, transfer them to a freezer-safe bag or container, where they can last for up to 3 months. Just thaw at room temperature for an hour before enjoying!
What if my cookie dough is too sticky?
If you find your marble cookie dough overly sticky, don’t worry! This can happen due to humidity or measuring discrepancies. Simply chill the dough in the refrigerator for about 30 minutes; this will help firm it up and make it easier to handle. Alternatively, you can sprinkle a little extra flour as you shape the cookies.
Are there any dietary alternatives for marble cookies?
Certainly! For a gluten-free version, substitute all-purpose flour with a 1: 1 gluten-free flour blend. You can also replace regular butter with coconut oil or vegan butter for a dairy-free option. If you’re looking to cut down on sugar, consider using natural sweeteners like maple syrup or agave nectar—just remember that this may change the texture slightly.
Can I add nuts or other mix-ins to my marble cookies?
Yes! Adding nuts like walnuts or pecans can give your marble cookies an extra crunch and depth of flavor. Raisins or dried cranberries are also delightful additions if you’re looking for something fruity. Just make sure not to overload the dough; about half a cup of mix-ins should do the trick without compromising the cookie’s structure.
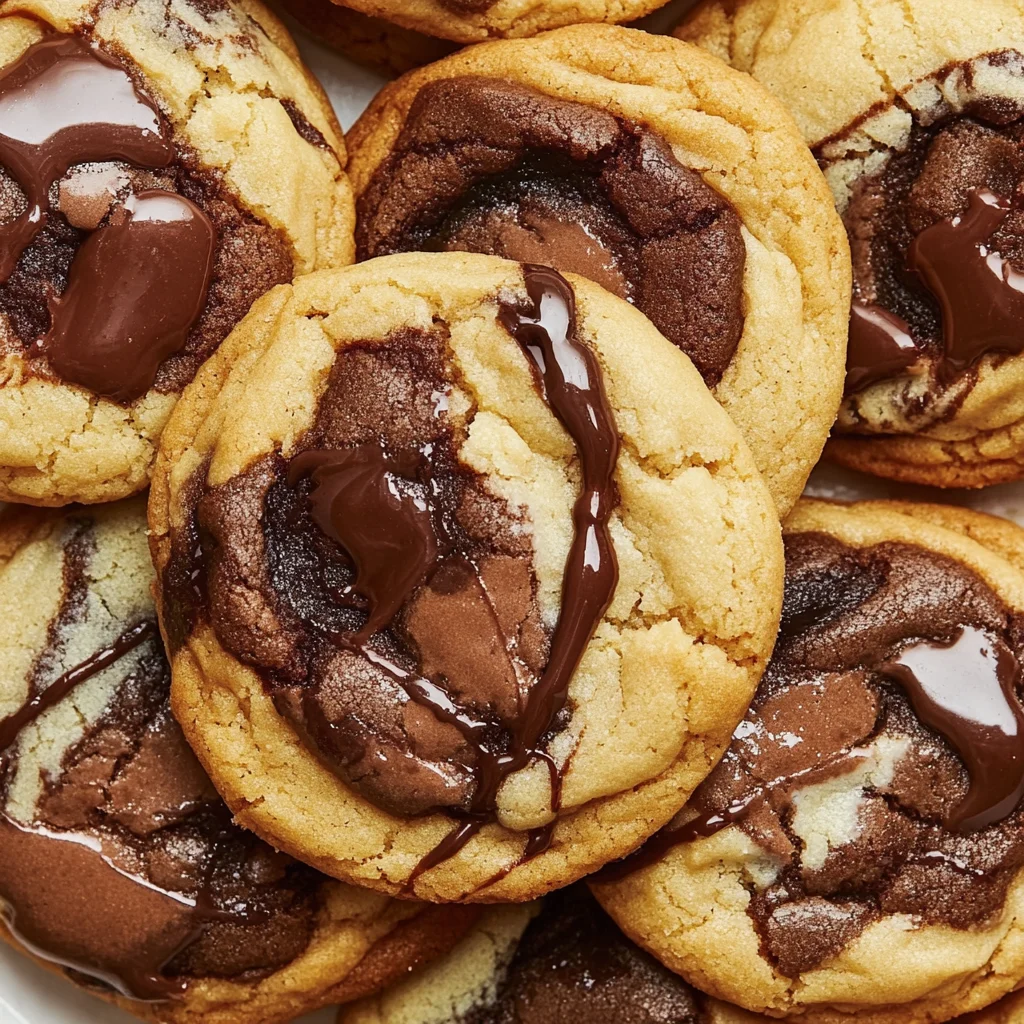
Marble Cookies
Ingredients
Method
- Preheat your oven to 350°F (175°C).
- Mix the dry ingredients in a bowl. Combine flour, baking soda, and salt, whisking until well blended.
- Cream the butter and sugars together in a separate mixing bowl until light and fluffy, about 3-4 minutes.
- Add the eggs and vanilla extract. Mix until fully incorporated.
- Combine the dry ingredients with the wet mixture gradually. Stir until just combined.
- Divide the dough into two bowls. In one bowl, fold in cocoa powder.
- Scoop alternating spoonfuls of each dough onto a lined baking sheet.
- Swirl a toothpick or knife through the scoops to create marble patterns.
- Bake in the preheated oven for 10-12 minutes or until edges are set but centers remain soft.


