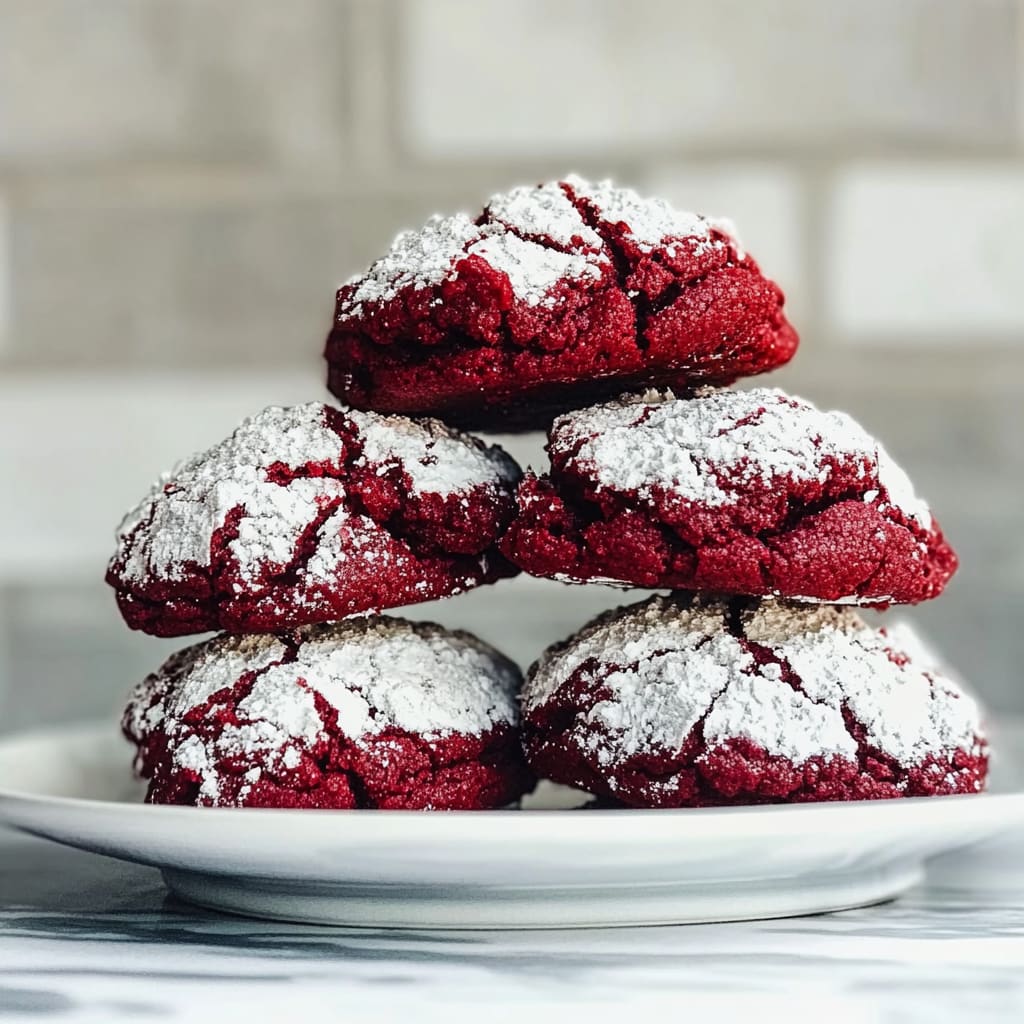
Imagine biting into a soft and chewy Red Velvet Crinkle Cookie, where the rich cocoa flavor dances with hints of vanilla, and a dusting of powdered sugar adds a sweet surprise. The moment you take that first bite, the cookie crumbles delightfully in your mouth, leaving behind a hint of cream cheese that lingers like a sweet memory from childhood baking days.
These vibrant cookies aren’t just a treat; they’re the showstopper at any gathering, perfect for birthdays or cozy holiday evenings. Picture yourself sharing these beauties with friends over coffee, laughter echoing in the air as each cookie disappears faster than the last. You won’t just taste them; you’ll experience joy in every crumb and create lasting memories with every batch baked.
Why Does Everyone Love Red Velvet Crinkle Cookies?
Decadent flavor: These cookies blend rich cocoa with buttery goodness, creating a delightful treat that melts in your mouth.
Eye-catching color: The vibrant red hue makes these cookies a stunning addition to any dessert table.
Simple ingredients: With just basic pantry staples, you can whip up these cookies in no time!
Irresistible texture: The soft and chewy center, dusted with powdered sugar, offers a delightful contrast that everyone craves.
Versatile delight: Perfect for holidays, parties, or a sweet treat any day of the week!
Red Velvet Crinkle Cookies Ingredients
For the Batter
- 1 cup all-purpose flour – This forms the base of your cookies, giving them structure and chewiness.
- 1 tablespoon cocoa powder – Adds a subtle chocolate flavor that complements the red velvet beautifully.
- 1 teaspoon baking powder – Helps the cookies rise, ensuring they’re soft and fluffy.
- 1/2 teaspoon baking soda – Enhances browning and gives the cookies a nice lift.
- 1/4 teaspoon salt – Balances the sweetness, enhancing all the flavors.
For the Mixture
- 1/2 cup unsalted butter (softened) – Provides richness and moisture for deliciously chewy cookies.
- 1 cup granulated sugar – Sweetens the cookies and contributes to their delightful texture.
- 1 large egg – Binds the ingredients together, adding moisture for a tender crumb.
- 1 tablespoon red food coloring – Gives these cookies their iconic red hue, making them festive and fun.
- 1 teaspoon vanilla extract – Infuses a warm, aromatic flavor that elevates your cookie experience.
For Coating
- 1/2 cup powdered sugar – Creates a lovely sweet finish that adds visual appeal to your Red Velvet Crinkle Cookies.
How to Make Red Velvet Crinkle Cookies
1. Preheat the oven to 350°F (175°C) and line a baking sheet with parchment paper. This sets the perfect stage for your cookies to bake evenly and come out deliciously soft.
2. Whisk together the dry ingredients: 1 cup all-purpose flour, 1 tbsp cocoa powder, 1 tsp baking powder, 1/2 tsp baking soda, and 1/4 tsp salt in a mixing bowl. This blend ensures your cookies have the right texture and flavor.
3. Cream the softened butter (1/2 cup) and granulated sugar (1 cup) in another bowl until light and fluffy. This step is crucial for achieving that melt-in-your-mouth quality!
4. Add in the egg (1 large), red food coloring (1 tbsp), and vanilla extract (1 tsp) to the butter mixture, mixing until well combined. Watch as this vibrant color transforms your dough into a festive treat!
5. Gradually mix in the dry ingredients with the wet ingredients until just combined. Be careful not to overmix—this will keep your Red Velvet Crinkle Cookies wonderfully chewy.
For the Coating:
6. Scoop tablespoon-sized portions of dough and roll them into balls with your hands. Each ball should be about a bite-sized treat, ready to be coated.
7. Roll each ball generously in powdered sugar (1/2 cup) until fully coated. This gives your cookies that signature crinkly look once they bake!
8. Place the coated dough balls on your prepared baking sheet, spacing them about 2 inches apart to allow for spreading while baking.
9. Bake in the preheated oven for 10-12 minutes, or until the edges are set but the centers are still soft. They’ll puff up beautifully—trust me, it’s worth watching!
10. Cool on the baking sheet for a few minutes before transferring them to a wire rack to cool completely. This helps them firm up just right without losing their delightful softness.
Optional: Dust with extra powdered sugar before serving for an elegant touch!
Exact quantities are listed in the recipe card below.
Tips for the Best Red Velvet Crinkle Cookies
- Butter Temperature: Use softened butter, not melted. This ensures a light and airy texture, crucial for soft crinkle cookies.
- Accurate Measuring: Spoon and level your flour to avoid dense cookies. Too much flour can make them dry instead of chewy.
- Chill Dough: If the dough feels too sticky, chill it in the refrigerator for 30 minutes. This makes rolling easier and helps keep the cookies from spreading too much.
- Don’t Overbake: Keep an eye on your cookies! They should look slightly underbaked in the center; they will continue to firm up as they cool.
- Coating Technique: Roll the dough balls generously in powdered sugar. A thick coating enhances the visual appeal and adds a delightful sweetness to each bite.
- Fresh Ingredients: Ensure your baking powder and baking soda are fresh. Expired leavening agents can lead to flat cookies that lack the desired crinkle effect.
How to Store and Freeze Red Velvet Crinkle Cookies
- Room Temperature: Store your Red Velvet Crinkle Cookies in an airtight container for up to 3 days to keep them soft and chewy.
- Fridge: If you prefer a longer shelf life, place the cookies in the fridge for up to a week. Ensure they are in a sealed container to prevent drying out.
- Freezer: For maximum freshness, freeze the cookies in a single layer on a baking sheet before transferring them to an airtight bag. They can last up to 3 months.
- Reheating: To enjoy them warm, pop the frozen cookies in the microwave for about 10-15 seconds. Enjoy that delightful softness!
Red Velvet Crinkle Cookies Variations
Feel free to explore these delightful twists and make this treat truly your own!
- Gluten-Free: Substitute all-purpose flour with a 1:1 gluten-free baking blend for a similar texture and taste. Your friends with gluten sensitivities will thank you for this tasty alternative!
- Nutty Flavor: Replace half of the all-purpose flour with almond flour. This adds a lovely nutty note that complements the chocolatey richness perfectly.
- Chewy Texture: Use brown sugar instead of granulated sugar for a deeper flavor and extra chewiness. The caramel notes of brown sugar will elevate your cookies to new heights!
- Extra Chocolatey: Increase cocoa powder to 2 tablespoons for a more intense chocolate flavor. This adjustment brings an irresistible richness that chocolate lovers will adore.
- Spicy Kick: Add 1/2 teaspoon of cinnamon or cayenne pepper to the dry ingredients. A dash of spice can add warmth and excitement, creating a surprising twist in each bite!
- Zesty Addition: Stir in the zest of one orange into the wet ingredients for a refreshing citrus contrast. The bright flavor will beautifully balance the richness of the cookies.
- Colorful Sprinkles: Fold in 1/2 cup of festive sprinkles before baking for a fun, celebratory touch. These cheerful cookies are perfect for birthdays or special occasions!
Make Ahead Options
If you’re looking to streamline your baking process, these Red Velvet Crinkle Cookies are perfect for meal prep! You can easily prepare the dry ingredients ahead of time by whisking together 1 cup of all-purpose flour, 1 tablespoon of cocoa powder, 1 teaspoon of baking powder, 1/2 teaspoon of baking soda, and 1/4 teaspoon of salt. For the wet ingredients, cream 1/2 cup of softened unsalted butter with 1 cup of granulated sugar, then mix in one large egg, 1 tablespoon of red food coloring, and 1 teaspoon of vanilla extract. You can even roll the cookie dough into balls and coat them in powdered sugar up to 24 hours in advance. Just store them in an airtight container in the fridge until you’re ready to bake! When it’s time to serve your delicious Red Velvet Crinkle Cookies, simply follow the baking instructions: preheat your oven to 350°F (175°C), space the dough balls on a lined baking sheet, and bake for 10-12 minutes until the edges are set but the centers remain soft. This way, you’ll have freshly baked cookies ready in no time!
Red Velvet Crinkle Cookies Recipe FAQs
What type of flour should I use for Red Velvet Crinkle Cookies?
You should use all-purpose flour for this recipe, as it provides the right balance of structure and tenderness. If you want a gluten-free version, you can substitute with a 1: 1 gluten-free baking flour blend.
How can I ensure my cookies are soft and chewy?
To achieve that deliciously soft and chewy texture, be careful not to overmix the dough after adding the dry ingredients. Also, keep an eye on your baking time; bake them just until the edges are set—about 10-12 minutes—while the centers remain slightly underbaked.
Can I store leftover cookies, and how long will they last?
Absolutely! These Red Velvet Crinkle Cookies can be stored in an airtight container at room temperature for up to 3 days. If you want them to last longer, consider refrigerating them, where they’ll stay fresh for about a week.
Is it possible to freeze these cookies?
Yes, you can freeze these cookies! Once cooled completely, place them in a single layer in an airtight container or freezer bag. They’ll maintain their deliciousness for up to 3 months. When you’re ready to enjoy them again, just thaw at room temperature or pop them in the microwave for a few seconds.
What if I don’t have red food coloring?
If you’re in a pinch without red food coloring, you can substitute it with beet juice or a natural red dye. However, keep in mind that the color may not be as vibrant as traditional red food coloring.
Can I adjust the sweetness of these cookies?
Certainly! If you’d like your cookies less sweet, reduce the granulated sugar by up to 1/4 cup without sacrificing texture too much. Just remember that sweetness balances out the rich cocoa flavor beautifully, so make adjustments according to your taste preferences!

Red Velvet Crinkle Cookies
Ingredients
Method
- Preheat the oven to 350°F (175°C) and line a baking sheet with parchment paper.
- In a mixing bowl, whisk together the flour, cocoa powder, baking powder, baking soda, and salt.
- In another bowl, cream the softened butter and granulated sugar until light and fluffy.
- Add the egg, red food coloring, and vanilla extract to the butter mixture and mix until well combined.
- Gradually add the dry ingredients to the wet ingredients, mixing until just combined.
- Scoop tablespoon-sized portions of dough and roll them into balls.
- Roll each ball in powdered sugar until fully coated.
- Place the coated dough balls on the prepared baking sheet, spacing them about 2 inches apart.
- Bake in the preheated oven for 10-12 minutes, or until the edges are set but the centers are still soft.
- Allow to cool on the baking sheet for a few minutes before transferring to a wire rack to cool completely.


