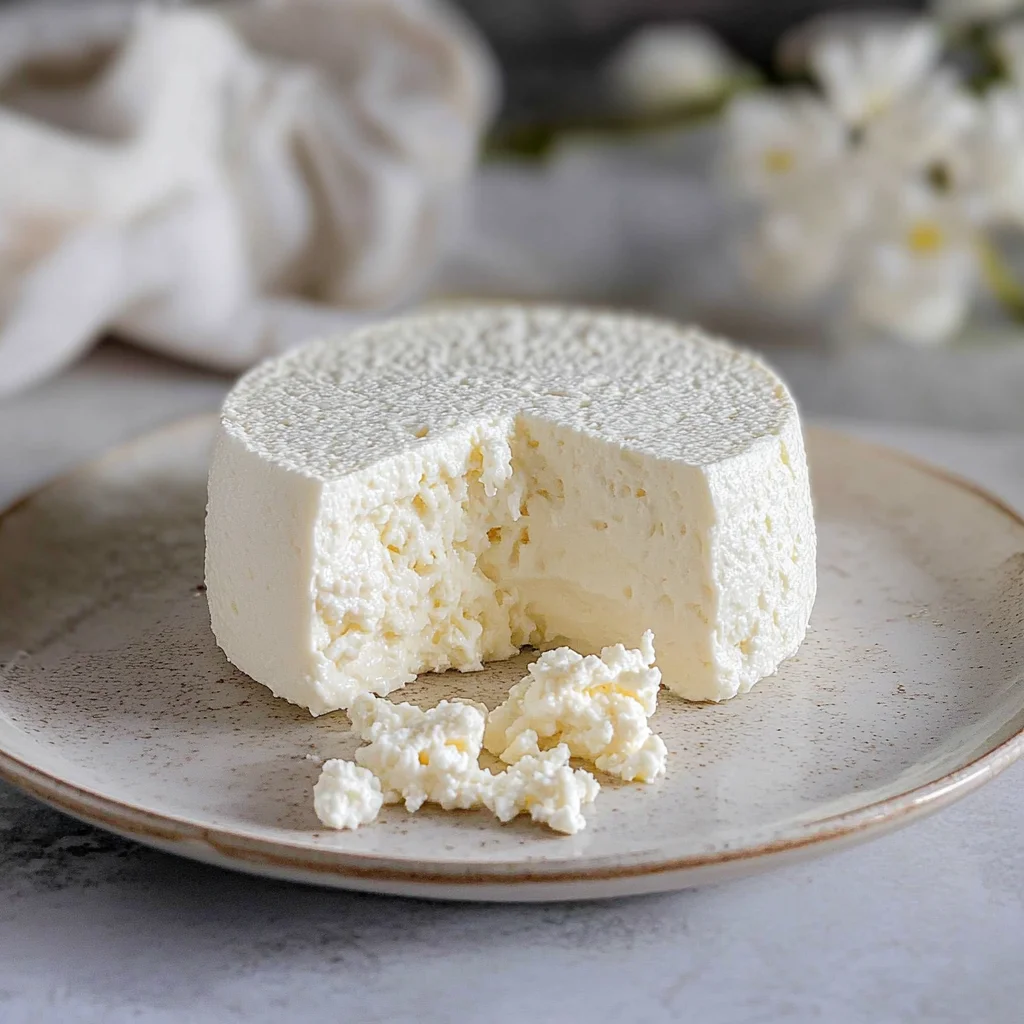
Imagine biting into a dish topped with creamy, crumbly queso fresco that melts in your mouth, bursting with freshness and a hint of tanginess. This versatile cheese is not just a topping; it’s the star of the show that elevates every meal, from vibrant tacos to zesty salads, making your taste buds dance with joy.
As I recall my childhood summers spent at family gatherings, the aroma of homemade tortillas sizzling on the griddle filled the air, accompanied by laughter and stories shared over heaping platters of food. Queso fresco was always present, adding that perfect finishing touch to every bite. Whether it’s a festive celebration or a casual weeknight dinner, this queso fresco recipe promises to create unforgettable moments around the table, leaving you craving more.
Why Will You Keep Making queso fresco recipe?
Freshness shines through with every bite of this cheese, made from high-quality whole milk. Simplicity is key; with just three ingredients and 30 minutes, you can whip up a delightful addition to any meal. Versatile in nature, queso fresco enhances everything from tacos to salads. Plus, it’s a crowd-pleaser, perfect for sharing at gatherings!
queso fresco recipe Ingredients
- For the Cheese
- 1 gallon whole milk – Preferably raw or pasteurized, not ultra-pasteurized for the best texture and flavor.
- For the Curdling Agent
- 1 cup white vinegar – Can substitute with lemon juice to achieve a similar tangy taste in your queso fresco recipe.
- For Seasoning
- 1 teaspoon salt – Adjust to taste, enhancing the overall flavor of your fresh cheese.
How to Make queso fresco recipe

1. Heat the Milk: In a large pot, heat 1 gallon of whole milk over medium heat until it reaches 190°F (88°C). Stir occasionally to prevent scorching and ensure even heating.
2. Add Vinegar: Once the milk is heated, remove it from the heat and slowly stir in 1 cup of white vinegar. Let it sit for about 10 minutes until curds form, creating that lovely cheese texture.
3. Strain the Curds: Line a strainer with cheesecloth and place it over a mixing bowl. Pour the curds and whey into the strainer to separate them, letting the whey drain away.
4. Rinse and Squeeze: Gather the cheesecloth and rinse the curds under cold water to wash away any vinegar taste. Squeeze out excess moisture gently for that perfect crumbly consistency.
5. Season and Shape: Transfer the curds to a bowl, add 1 teaspoon of salt, and mix well. Shape into a ball or press into a mold for an appealing presentation.
6. Let it Firm Up: Allow the cheese to sit at room temperature for a few hours to firm up before refrigerating, ensuring it’s ready for all your favorite dishes.
Optional: Add fresh herbs or spices for an extra flavor twist!
Exact quantities are listed in the recipe card below.
Expert Tips
- Milk Choice Matters: Use whole milk that is raw or pasteurized, avoiding ultra-pasteurized for the best curd formation in your queso fresco recipe.
- Temperature Precision: Heat the milk to exactly 190°F (88°C) to ensure proper curd development; too hot can scorch, while too cool won’t form curds.
- Vinegar Variation: If you prefer a fresher taste, substitute white vinegar with lemon juice; it will impart a delightful citrus note to your cheese.
- Rinsing Curds: Rinse the curds thoroughly under cold water to eliminate any residual vinegar flavor, which can overpower the delicate taste of your queso fresco recipe.
- Moisture Control: Squeeze out excess moisture from the cheesecloth gently; too much liquid can result in a crumbly texture rather than the desired firmness.
- Resting Time: Allow your shaped cheese to rest at room temperature for a few hours before refrigerating; this helps it firm up beautifully.
How to Store and Freeze queso fresco recipe
- Fridge: Keep your queso fresco recipe in an airtight container for up to 5 days to maintain its freshness and crumbly texture.
- Freezer: For longer storage, wrap the cheese tightly in plastic wrap and place it in a freezer-safe bag. It can be frozen for up to 3 months.
- Thawing: When ready to use, thaw your queso fresco recipe in the fridge overnight for the best texture. Avoid refreezing once thawed.
- Serving Suggestions: Use fresh, crumbled queso fresco within a few days for optimal flavor. Enjoy it on tacos, salads, or as a simple snack!
queso fresco recipe Your Way
Feel free to get creative and customize this delightful cheese to suit your taste and dietary needs!
- Dairy-Free: Substitute whole milk with unsweetened almond or soy milk to create a plant-based version. While the texture will be slightly different, it can still offer a creamy finish perfect for salads or tacos.
- Herbed Delight: Mix in fresh herbs like cilantro or oregano before pressing the cheese for an aromatic twist. This addition enhances the flavor profile, making it a vibrant topping for any dish.
- Zesty Kick: Add lime juice instead of vinegar for a citrusy tang that brightens the flavor. The zesty notes will elevate your dishes, providing a refreshing contrast to rich foods.
- Smoky Flavor: Incorporate smoked salt in place of regular salt for a deeper taste. This subtle smokiness creates an intriguing complexity, perfect for grilled meats or veggies.
- Spicy Cheese: Mix in chopped jalapeños or red pepper flakes to infuse some heat into your queso fresco. Adjusting the spice level can make it a fun addition to nachos or spicy salsas.
- Creamy Texture: Blend in a bit of heavy cream for an extra creamy consistency if desired. This variation is luscious and perfect for spreading on warm tortillas or crusty bread.
- Sweet Twist: Add a touch of honey or agave syrup along with the salt for a hint of sweetness. This unexpected flavor combination pairs beautifully with fruits or on a charcuterie board.
- Nutty Flavor: Stir in crushed nuts such as pistachios or walnuts after pressing for added crunch and richness. This twist not only enhances texture but also brings an inviting nutty flavor to your cheese creations.
Make-Ahead Tips for queso fresco recipe

Preparing your queso fresco recipe ahead of time is a fantastic way to streamline your meal prep and ensure you always have this delicious cheese on hand. You can easily heat the 1 gallon of whole milk and combine it with 1 cup of white vinegar, allowing the curds to form. This process can be done up to 24 hours in advance, giving you flexibility in your cooking schedule. Once you’ve rinsed and pressed the curds, simply store them in an airtight container in the refrigerator for up to 3 days. When you’re ready to serve, just let the cheese sit at room temperature for a few hours to regain its crumbly texture. This simple make-ahead strategy not only saves time but also ensures your queso fresco is fresh and flavorful whenever you need it!
queso fresco recipe Questions Answered
What type of milk is best for making queso fresco?
For the best results, use 1 gallon of whole milk that is either raw or pasteurized. Avoid ultra-pasteurized milk, as it can affect the curd formation. The richer fat content in whole milk helps create a creamier texture, making your cheese delightful.
Can I use something other than white vinegar?
Absolutely! While the recipe calls for 1 cup of white vinegar, you can substitute it with an equal amount of lemon juice. This alternative gives your queso fresco a subtle hint of citrus without compromising the overall flavor.
How should I store my homemade queso fresco?
Once your cheese has cooled and firmed up, wrap it tightly in plastic wrap or store it in an airtight container. It can be refrigerated for up to one week. If you notice any moisture buildup inside the container, simply dab it with a paper towel to keep your cheese fresh.
Is it possible to freeze queso fresco?
Yes, you can freeze your queso fresco if needed! Just make sure it’s well-wrapped in plastic wrap and then placed inside a freezer bag. It will maintain its quality for about 2-3 months. When you’re ready to use it, thaw it in the refrigerator overnight for the best texture.
What if my curds don’t form properly?
If your curds aren’t forming after adding vinegar, ensure that your milk reached the correct temperature of 190°F (88°C) before removing it from heat. You may also need to let it sit a bit longer than 10 minutes. Sometimes patience is key—give those curds time to develop!
How many servings does this queso fresco recipe yield?
This recipe yields approximately 4 servings, with each serving containing around 100 calories. It’s perfect as a topping for various dishes or simply enjoyed on its own as a snack.


