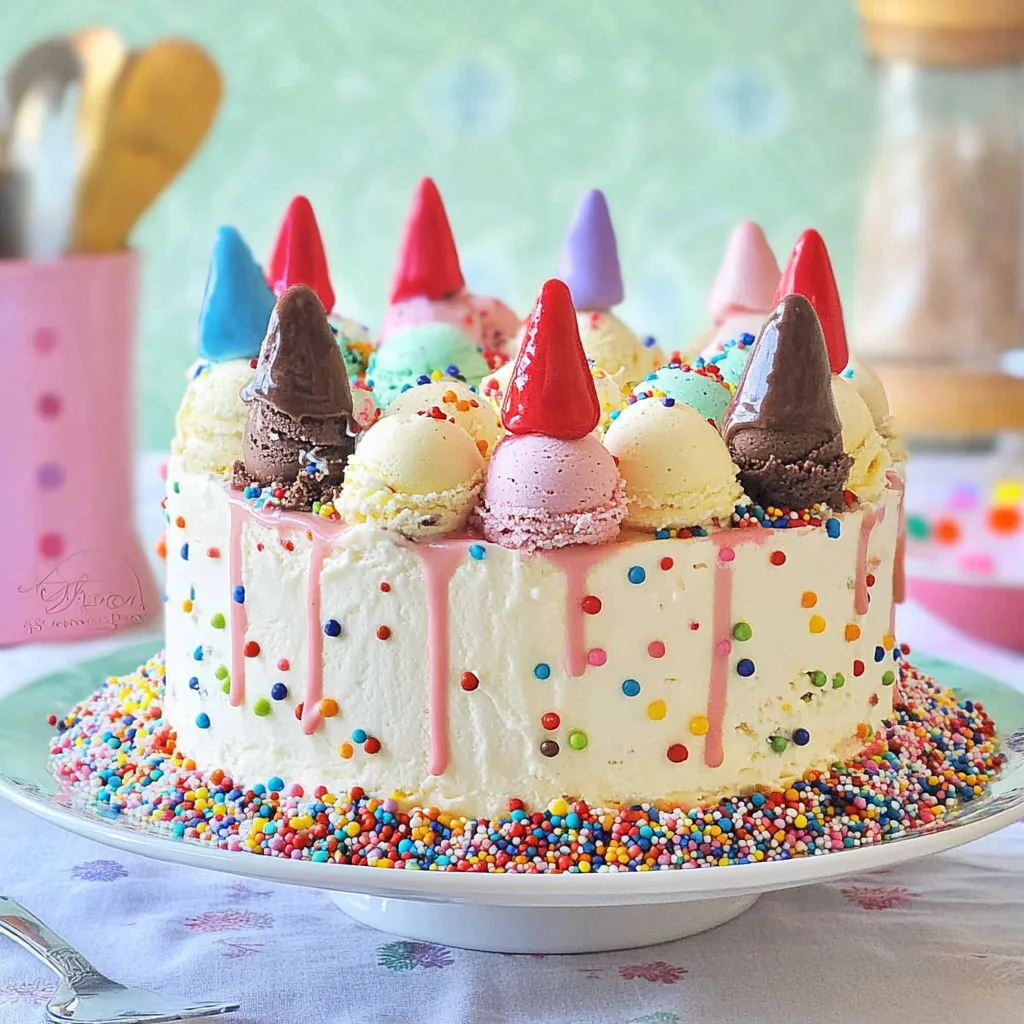
Imagine slicing into a luscious ice cream cake, where velvety layers of rich chocolate or vanilla cake meet creamy, dreamy ice cream, creating a symphony of flavors that dance on your taste buds. The moment the chilled slice hits your tongue, it’s like an explosion of joy, with each bite melting away the mundane and whisking you straight to dessert heaven.
Growing up, ice cream cake was the star of every birthday party, the main attraction that had everyone lining up for a scoop. Whether it was a summer barbecue or a cozy winter gathering, this delightful dessert never failed to bring smiles and laughter, making it the perfect centerpiece for any celebration. With its irresistible combination of textures and flavors, you can’t help but anticipate that first indulgent bite!
Why Is ice cream cake So Irresistibly Good?
Layers of delight come together in this ice cream cake that’s as visually stunning as it is delicious! Simple ingredients like all-purpose flour and granulated sugar create a fluffy cake layer that perfectly complements your favorite ice cream. Customization is key; choose any flavor to reflect your personal taste or celebrate special occasions. Quick prep time means you can whip this up in just 30 minutes, saving you time while impressing guests. And let’s not forget the crowd-pleasing toppings like whipped cream, chocolate syrup, and sprinkles that elevate this dessert into a party masterpiece!
ice cream cake Ingredients
For the Cake Layer
- 1 cup all-purpose flour – This forms the base of your cake and provides structure.
- 1 cup granulated sugar – Sweetens the cake, balancing the flavors beautifully.
- 1 tsp baking powder – Helps the cake rise, making it fluffy and light.
- 1/2 cup unsalted butter (softened) – Adds richness and moisture to your cake.
- 2 large eggs – Binds the ingredients together for a cohesive texture.
- 1 tsp vanilla extract – Infuses a lovely aroma and depth of flavor into the cake.
- 1/2 cup milk – Keeps the batter moist, ensuring a tender crumb.
For the Ice Cream Layer
- 2 pints ice cream (any flavor) – Choose your favorite flavors to create a delightful contrast with the cake.
For the Topping
- 1 cup whipped cream (for decoration) – Adds a light, fluffy finish that’s perfect for presentation.
- 1/4 cup chocolate syrup (optional) – A delicious drizzle that enhances both flavor and visual appeal.
- 1/4 cup sprinkles (optional) – Sprinkle on top for a festive touch that’s sure to delight!
How to Make ice cream cake

1. Preheat the oven to 350°F (175°C). Grease and flour a 9-inch round cake pan to ensure your cake comes out easily and has a lovely golden crust.
2. Cream together the softened butter and granulated sugar in a mixing bowl until the mixture is light and fluffy. This will help create a tender texture for your cake layer.
3. Add the eggs one at a time, mixing well after each addition. Stir in the vanilla extract, letting the sweet aroma fill your kitchen as you create a rich batter.
4. Whisk together the all-purpose flour and baking powder in another bowl. Gradually add this dry mixture to the creamed mixture, alternating with milk for optimal smoothness.
5. Pour the batter into the prepared cake pan and bake for 25-30 minutes or until a toothpick inserted into the center comes out clean — watch for that delightful golden hue!
6. Cool the cake completely in the pan before removing it. This step prevents breakage and ensures your layers stay intact for assembling.
Assemble Ice Cream Cake:
7. Slice the cooled cake horizontally to create two equal layers, preparing them for their delicious ice cream filling.
8. Place one cake layer back in the pan and spread a generous layer of your chosen ice cream on top, making sure it covers evenly for that luscious taste!
9. Add the second cake layer on top of the ice cream, pressing gently to help it adhere while maintaining its beautiful shape.
10. Spread another layer of ice cream over the top of this second layer and cover everything with plastic wrap; it’s time for this beauty to freeze!
11. Freeze for at least 4 hours or until firm, ensuring all those delicious flavors meld together perfectly.
Decorate:
12. Remove your frozen masterpiece from the freezer and carefully take it out of the pan, revealing those lovely layers.
13. Spread whipped cream over the top and sides of the cake for a fluffy, inviting finish that makes it look irresistible!
14. Drizzle with chocolate syrup and sprinkle with colorful sprinkles if desired — these fun touches add both flavor and flair!
15. Slice and serve immediately, watching everyone’s faces light up as they enjoy this delightful dessert together!
Optional: For an extra touch, try adding fresh berries on top before serving!
Exact quantities are listed in the recipe card below.
Tips for the Best ice cream cake
- Room Temperature Butter: Ensure your butter is softened to room temperature for a light and fluffy cake batter—this helps the sugar incorporate better.
- Egg Addition: Add eggs one at a time and mix well; this prevents the batter from becoming grainy and ensures even texture in your ice cream cake.
- Flour Mixing: When adding flour, do it gradually while alternating with milk. This prevents lumps and keeps the batter smooth, crucial for that perfect cake layer.
- Cooling Time: Allow your cake to cool completely before slicing. A warm cake can slip apart when layered with ice cream, leading to a messy ice cream cake.
- Ice Cream Consistency: Let your ice cream soften slightly before spreading; this makes it easier to layer and prevents cracking in the cake layers when you assemble.
- Decorative Whipped Cream: Use a chilled bowl and beaters when whipping cream. This will help achieve stiff peaks, ensuring your decoration holds beautifully on the finished ice cream cake.
How to Store and Freeze ice cream cake
- Fridge: Keep your ice cream cake covered in plastic wrap or in an airtight container for up to 3 days to maintain its freshness and prevent freezer burn.
- Freezer: For longer storage, wrap the cake tightly in aluminum foil and place it in the freezer, where it can last up to 2 weeks without losing its delightful flavor.
- Thawing: When ready to enjoy, transfer the ice cream cake from the freezer to the fridge for about 30 minutes before serving for a perfect slice every time.
- Toppings: If using whipped cream or sprinkles, add them just before serving to keep them fresh and visually appealing.
ice cream cake Your Way
Feel free to let your creativity shine by customizing this delightful dessert to suit your taste and occasion!
- Gluten-Free: Substitute all-purpose flour with a 1:1 gluten-free baking blend for a deliciously inclusive treat. This swap allows everyone to enjoy a slice of happiness without worries.
- Cocoa Delight: Replace 1/4 cup of flour with cocoa powder for a rich chocolate cake layer. Chocolate lovers will rejoice at this decadent twist, bringing an extra layer of flavor to each bite.
- Fruit-Filled: Fold in 1/2 cup of mashed bananas or applesauce into the cake batter for added moisture and natural sweetness. This fruity addition elevates the dessert and keeps it light and fresh.
- Nutty Crunch: Add 1/2 cup of chopped walnuts or almonds to the batter for a delightful crunch. The nutty texture complements the creamy ice cream beautifully, creating a satisfying contrast.
- Zesty Lemon: Incorporate 1 tablespoon of lemon zest into the batter for a citrusy kick. This bright note balances the sweetness of the ice cream, making it refreshingly unique.
- Caramel Swirl: Drizzle 1/4 cup of caramel sauce into the ice cream before layering it on top of the cake. The gooey caramel adds a luscious richness that’s simply irresistible.
- Spicy Surprise: Mix in 1/2 teaspoon of cinnamon or even a pinch of cayenne pepper for an unexpected warmth. This subtle heat can elevate your dessert experience, leaving guests pleasantly surprised.
- Vegan Option: Use plant-based butter and flax eggs (2 tablespoons ground flaxseed mixed with 6 tablespoons water) instead of regular butter and eggs. This substitution opens up new possibilities without sacrificing flavor!
Make Ahead Options

This ice cream cake is perfect for meal prep, allowing you to enjoy a delightful dessert without the stress of last-minute assembly. You can prepare the cake layer up to 24 hours in advance—simply bake it using 1 cup of all-purpose flour, 1 cup of granulated sugar, and other ingredients like 1/2 cup of softened unsalted butter and 2 large eggs. Once cooled completely, slice it in half and layer with your favorite 2 pints of ice cream. For added convenience, you can even freeze the assembled cake for up to 3 days before decorating. Just remember to keep the whipped cream and optional toppings like chocolate syrup and sprinkles separate until you’re ready to serve for optimal freshness. When it’s time to indulge, simply remove the cake from the freezer, frost it with whipped cream, and add your desired toppings before slicing into this delicious ice cream cake!
ice cream cake Questions Answered
What kind of flour should I use for the cake layer?
For this ice cream cake, all-purpose flour is ideal because it provides the perfect structure and texture. If you’re looking for a gluten-free option, you can substitute with a gluten-free all-purpose blend, but make sure it includes a binding agent like xanthan gum for best results.
Can I use any flavor of ice cream for the layers?
Absolutely! This recipe is flexible—choose your favorite flavors or mix and match to create a unique taste sensation. Just remember that denser ice creams will be easier to spread. Classic choices like chocolate, vanilla, or strawberry always work well, especially when layered in combination.
How should I store leftovers of the ice cream cake?
If you have any leftovers (which is rare!), wrap the cake tightly in plastic wrap or aluminum foil and store it in the freezer. Properly stored, it can last up to 2 weeks. Just make sure to cut slices before wrapping to make serving easier later!
What if my cake layer doesn’t rise properly?
If your cake layer doesn’t rise as expected, it could be due to expired baking powder or not enough mixing. Always check the expiration date on your baking powder before use, and ensure you mix until just combined—over-mixing can lead to a dense cake.
How long should I freeze the assembled cake?
After assembling your ice cream layers between the cake layers, cover it with plastic wrap and freeze for at least 4 hours or until firm. For the best texture, consider freezing overnight if you’re making this dessert ahead of time.
What’s a good alternative for whipped cream topping?
If you’re looking for a lighter option than whipped cream, consider using a fluffy meringue or a dairy-free whipped topping made from coconut milk or almond milk. These alternatives still provide that delightful finish while catering to various dietary preferences!
Ice Cream Cake
Ingredients
Method
- Preheat the oven to 350°F (175°C). Grease and flour a 9-inch round cake pan.
- In a mixing bowl, cream together the butter and sugar until light and fluffy.
- Add the eggs one at a time, mixing well after each addition. Stir in the vanilla.
- In another bowl, whisk together the flour and baking powder. Gradually add to the creamed mixture, alternating with milk.
- Pour the batter into the prepared cake pan and bake for 25-30 minutes or until a toothpick comes out clean.
- Allow the cake to cool completely in the pan before removing.
- Once the cake is cooled, slice it in half horizontally to create two layers.
- Place one layer back in the cake pan. Spread a layer of ice cream on top.
- Add the second cake layer on top of the ice cream and press gently.
- Spread another layer of ice cream on top and cover with plastic wrap.
- Freeze for at least 4 hours or until firm.
- Remove the cake from the freezer and carefully take it out of the pan.
- Spread whipped cream over the top and sides of the cake.
- Drizzle with chocolate syrup and sprinkle with sprinkles if desired.
- Slice and serve immediately.


