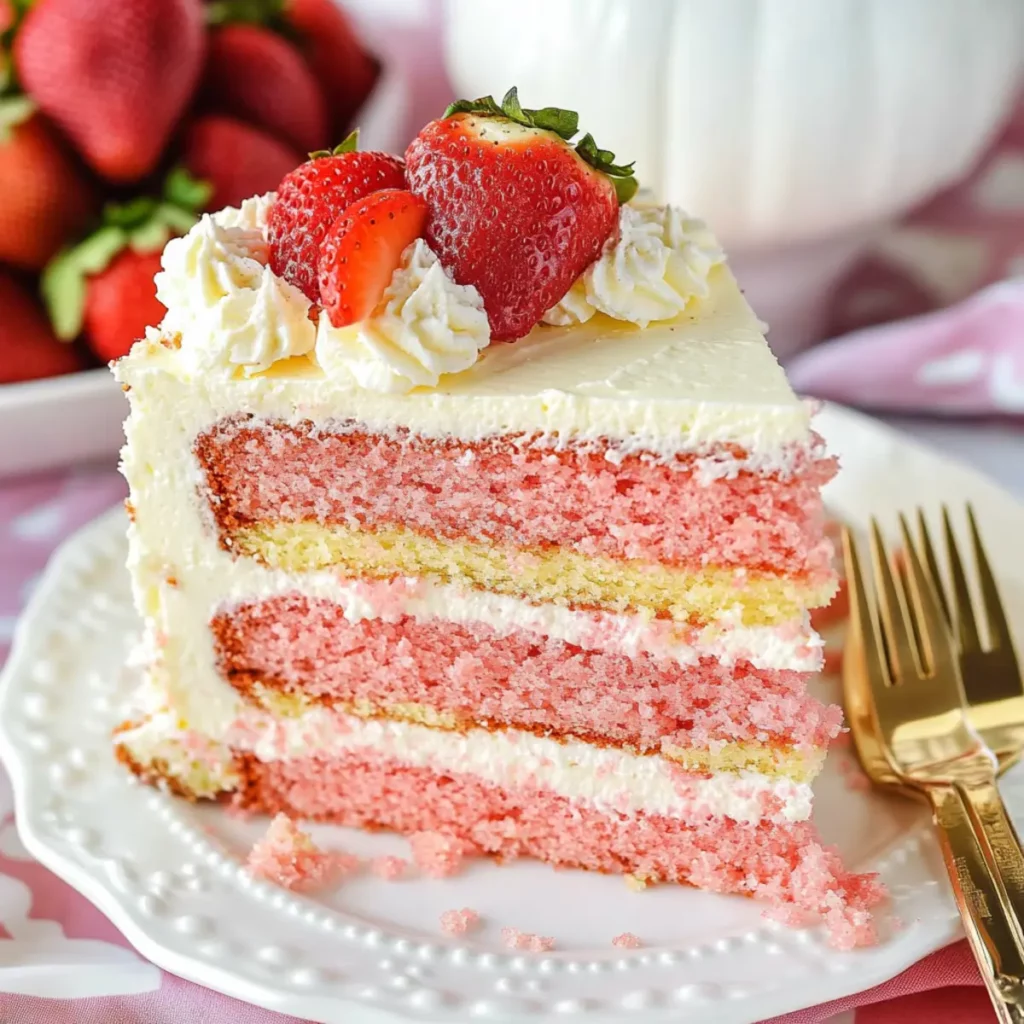
Here in the world of baked delights, the Strawberry Vanilla Layer Cake stands tall like a majestic tower of sweetness—its bright colors and layers beckoning you to take a slice. With fruity notes dancing in harmony with creamy vanilla, this cake is not just a dessert; it’s a celebration in every bite.
Imagine the feathery layers melting on your tongue, with a crunchy topping that adds an exciting twist. Whether you’re hosting a summer picnic, celebrating a birthday, or just indulging in a sweet treat after dinner, this Strawberry Vanilla Layer Cake is sure to evoke nostalgia and joy.
Why You'll Love This Strawberry Vanilla Layer Cake
- This incredible Strawberry Vanilla Layer Cake transforms simple everyday ingredients into restaurant-quality flavors that will blow your mind completely.
- Foolproof recipe techniques guarantee perfect results every single time, making even novice cooks feel like professional chefs instantly.
- Stunning visual appeal with gorgeous colors and mouthwatering aromas creates the ultimate Instagram-worthy dish for any special occasion.
- Endlessly adaptable for different dietary needs while working beautifully for meal prep, date nights, or entertaining large groups effortlessly.
Ingredients for Strawberry Vanilla Layer Cake
Here’s what you’ll need to make this delicious Strawberry Vanilla Layer Cake:
1 1/2 cups strawberry puree – This can be made easily by pureeing fresh strawberries until smooth. It’s essential for that fruity flavor in your cake.
3 cups plus 2 tbsp all-purpose flour – Use good quality flour for a light cake texture.
3 1/4 tsp baking powder – This will help the cake rise nice and fluffy. Make sure it’s fresh for best results.
3/4 tsp salt – Just a hint to balance the sweetness.
10 tbsp unsalted butter – Should be at room temperature for easy creamy mixing.
1/2 cup plus 2 tbsp vegetable oil – This keeps the cake moist and adds flavor.
1 3/4 cups sugar – Because what’s cake without a good amount of sweetness?
1 tbsp vanilla extract – Use real vanilla for a richer flavor profile.
5 large eggs – Room temperature eggs blend better into the batter.
3/4 cup plus 1 tbsp milk – This adds moisture; divide as needed in the recipe.
1 1/4 tsp strawberry extract – Enhances the strawberry flavor; optional but recommended.
15 drops red food coloring – Just a touch for that radiant cake color.
1 cup all-purpose flour (divided) – For the crunchy topping.
1/2 cup sugar (divided) – Partly for the crunchy topping to add sweetness.
3/4 cup freeze-dried strawberries – These give that extra crunch factor.
7 tbsp salted butter (divided) – Use quality butter for a creamy frosting.
1/2 tsp vanilla extract (for frosting) – A touch of flavor in the frosting.
3/4 cup plus 2 tbsp strawberry puree – Use fresh strawberries for the best flavor.
1 1/4 cups unsalted butter (for frosting) – Room temperature for smooth mixing.
5 cups powdered sugar – Essential for that perfect frosting consistency.
1/2 tsp vanilla extract – For flavor in your frosting.
Pinch of salt – This enhances the sweetness and flavor.
2 1/2 cups unsalted butter (for final frosting) – Ensures a creamy finish.
10 cups powdered sugar (for final frosting) – For extra sweetness and structure.
2 1/2 tsp vanilla extract (for final frosting) – Adds flavor depth.
4–6 tbsp water or cream – To adjust frosting consistency as needed.
Pinch of salt (for final frosting) – Just a touch to balance sweetness.
How to Make Strawberry Vanilla Layer Cake
Follow these simple steps to prepare this delicious Strawberry Vanilla Layer Cake:
Step 1: Prepare the Strawberry Puree
Start by adding the strawberry puree to a saucepan. Cook over medium heat until it thickens and reduces by half, about 15-20 minutes. Allow the puree to cool to at least room temperature; this helps concentrate the flavor.
Step 2: Preheat and Prep the Pans
Preheat your oven to 350°F (176°C). Prepare four 8-inch cake pans by lining the bottoms with parchment paper and greasing the sides. You want your cakes to slide out like a dream!
Step 3: Mix the Dry Ingredients
In a medium bowl, combine the flour, baking powder, and salt. This step is crucial for the cake’s structure, so give it a good whisk to ensure even distribution.
Step 4: Combine Wet Ingredients
In a large mixer bowl, beat the room temperature butter, vegetable oil, sugar, and vanilla extract together until light and fluffy, around 3-4 minutes. Add the eggs one at a time, mixing until mostly combined after each. Scrape the sides of the bowl if needed.
Step 5: Combine Wet and Dry Mixtures
Add half of the dry ingredients to the butter mixture and mix until just combined. Then, add 1 tablespoon of milk and mix until combined. Follow this by adding the rest of the dry ingredients, mixing gently. Be careful not to over-mix; you want your cake fluffier than a cloud!
Step 6: Divide and Bake
Divide the batter evenly between two bowls. In one bowl, gently fold in the remaining milk. In the other, mix in the reduced strawberry puree, strawberry extract, and red food coloring. Pour each batter into two prepared pans and bake for 22-25 minutes, or until a toothpick comes out with just a few crumbs.
Finish up your masterpiece with frosting, layering it generously, and enjoy! Transfer to plates and take lots of pictures; this Strawberry Vanilla Layer Cake deserves to be shared!

You Must Know About Strawberry Vanilla Layer Cake
- This showstopping Strawberry Vanilla Layer Cake delivers restaurant-quality results using simple ingredients you probably already have at home.
- The perfect balance of textures and flavors creates an unforgettable dining experience that will have everyone asking for seconds.
- Picture-perfect presentation with vibrant colors makes this dish absolutely Instagram-worthy and guaranteed to impress any dinner guest.
- Incredibly versatile recipe that works beautifully for weeknight dinners, meal prep, special occasions, or even outdoor entertaining sessions.
Perfecting Strawberry Vanilla Layer Cake Cooking Process
To achieve the best results, start by preparing your strawberry puree while the oven preheats. Then, mix the dry ingredients followed by the wet ones. Bake the layers while the crunchies are in the oven. Finally, assemble and frost the cake, and voila!
Add Your Touch to Strawberry Vanilla Layer Cake
Feel free to swap out strawberries for other berries like raspberries or blueberries. You can also add lemon zest to the cake for a zesty kick or opt for a cream cheese frosting for a tangy twist. The possibilities are endless!
Storing & Reheating Strawberry Vanilla Layer Cake
Store leftovers in an airtight container at room temperature for one day, or refrigerate for up to a week. For the best flavor and texture, let slices come to room temperature before serving. Reheat gently in the microwave if needed.
Chef's Helpful Tips for Strawberry Vanilla Layer Cake
- This professional-quality Strawberry Vanilla Layer Cake relies on precise timing and temperature control to achieve restaurant-standard results consistently.
- Master the art of mise en place by prepping all ingredients beforehand, ensuring smooth execution and preventing any last-minute cooking disasters.
- The secret lies in layering flavors throughout the cooking process rather than seasoning only at the end for maximum depth.
- Pro tip: let the finished dish rest for optimal texture and flavor development before serving to hungry guests waiting eagerly.
Sometimes, while baking this cake, I remember the first time I made it for a family gathering. Everyone couldn’t stop complimenting it, especially the crunchy topping, which stole the show!

FAQs About Strawberry Vanilla Layer Cake
What is Strawberry Vanilla Layer Cake?
Strawberry Vanilla Layer Cake is a delightful dessert that features layers of fluffy vanilla and strawberry-flavored cakes, often frosted with a smooth buttercream or cream cheese frosting. The cake is not only visually appealing but combines the sweetness of strawberries with the rich flavor of vanilla. This iconic treat has a crunchy topping made from freeze-dried strawberries, adding a unique texture and burst of flavor. Perfect for celebrations or a sweet indulgence, this cake is a showstopper that friends and family will love.
How do I store Strawberry Vanilla Layer Cake?
To keep your Strawberry Vanilla Layer Cake fresh, store it in an airtight container. If you plan to enjoy it within a day, it’s fine to leave it at room temperature. For longer preservation, refrigerate the cake for up to a week. Remember to let each slice come to room temperature before serving for the best flavor and texture. If you’re reheating, do so gently in the microwave to avoid drying it out. This way, you can savor this delicious treat anytime!
Can I customize my Strawberry Vanilla Layer Cake?
Absolutely! You can customize your Strawberry Vanilla Layer Cake by swapping strawberries for other berries like raspberries or blueberries. For an extra zing, consider adding lemon zest or a hint of almond extract to the batter. You could also try using a cream cheese frosting instead of traditional buttercream for a tangy twist. The options are endless, enabling you to create a cake that suits your taste and occasion perfectly!
What occasions is Strawberry Vanilla Layer Cake suitable for?
Strawberry Vanilla Layer Cake is versatile and suitable for a range of occasions. It’s perfect for birthdays, anniversaries, or any festive celebration where you want to impress guests with a beautiful dessert. Additionally, it’s an excellent treat for casual gatherings or outdoor picnics, thanks to its vibrant flavors and eye-catching presentation. Whether it’s a special event or a sweet surprise for your family, this cake will surely bring joy to any table.
Conclusion for Strawberry Vanilla Layer Cake
The Strawberry Vanilla Layer Cake is a delightful combination of flavors and textures that makes it an unforgettable dessert. From the moist layers of cake to the crunchy topping, every bite is a celebration of sweetness. This cake stands out not only for its vibrant appearance but also for its versatility and ease of customization. Whether for a special occasion or a cozy family meal, the Strawberry Vanilla Layer Cake promises to bring smiles and memorable moments to your dining experience. Don’t hesitate to treat yourself and loved ones!
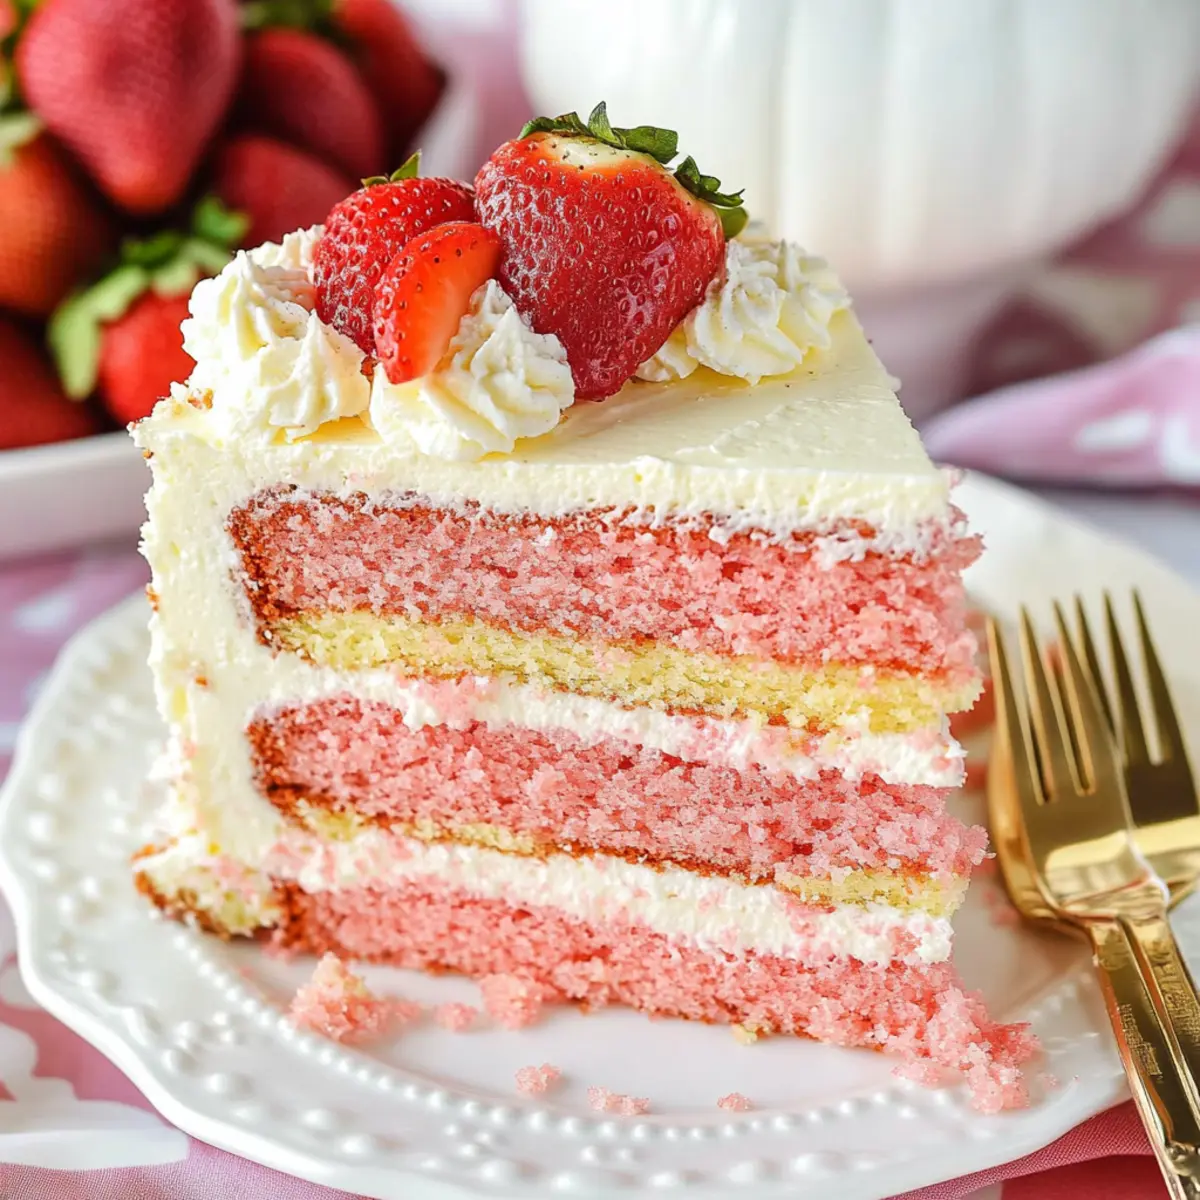
Delicious Strawberry Vanilla Layer Cake with Crunchy Topping
Ingredients
Equipment
Method
- Add the strawberry puree to a saucepan and cook over medium heat until it thickens and reduces by half to 3/4 cup, about 15-20 minutes.
- Allow the puree to cool to at least room temperature.
- Prepare four 8-inch cake pans with parchment paper circles in the bottom and grease the sides. Preheat oven to 350°F (176°C).
- Combine the flour, baking powder, and salt in a medium bowl and set aside.
- In a large mixer bowl, beat butter, oil, sugar, and vanilla extract together until light and fluffy, about 3-4 minutes.
- Add the eggs one at a time, mixing until mostly combined after each. Scrape down the sides of the bowl as needed.
- Add half of the dry ingredients to the batter and mix until mostly combined.
- Add 1 tablespoon of the milk and mix just until combined.
- Add the rest of the dry ingredients and mix until combined. Do not over mix.
- Divide the batter evenly between two bowls.
- To one bowl, add the remainder of the milk (3/4 cup) and gently fold. To the other bowl, add the reduced strawberry puree, strawberry extract, and red food coloring and gently fold.
- Divide each batter evenly between two pans and bake for 22-25 minutes or until a toothpick comes out with a few crumbs.
- Preheat oven to 350°F. Line two cookie sheets with parchment paper or a silicone baking mat.
- For the crunchies, add 1/2 cup of flour and 1/4 cup of sugar to two separate bowls.
- In a food processor, grind the freeze-dried strawberries into a powder and add it to the strawberry crunchies bowl.
- To the strawberry bowl, add 4 tablespoons of butter and vanilla extract; combine well. To the vanilla bowl, add 3 tablespoons of butter and combine until it forms a crumble.
- Spread the strawberry crumble onto one cookie sheet and the vanilla crumble onto another. Bake for about 5 minutes.
- Once cool, break the crumble into smaller pieces, no larger than a small pea, and combine all the pieces together.
- For the strawberry frosting, add the strawberry puree to a saucepan and cook over medium heat until reduced to a little less than 1/2 cup, about 10-15 minutes.
- Allow the puree to cool to at least room temperature.
- In a large mixer bowl, beat the butter until smooth.
- Add half of the powdered sugar and beat until well combined.
- Add half of the strawberry reduction and beat until well combined.
- Add the vanilla extract and salt, and mix until well combined.
- Add the remaining powdered sugar and beat until smooth. Adjust consistency with additional strawberry reduction, milk, or cream if needed.
- For the vanilla frosting, beat the butter until smooth.
- Gradually add half of the powdered sugar and mix until smooth.
- Add the vanilla extract and 4 tablespoons of water or cream and mix until smooth.
- Gradually add the remaining powdered sugar and mix until smooth. Adjust consistency with additional water or cream if needed.
- To build the cake, level the tops of the cakes with a serrated knife.
- Place the first layer of strawberry cake on a serving plate. Pipe a dam of vanilla frosting around the edge and fill with about 1 cup of strawberry frosting. Spread evenly.
- Top with the first layer of vanilla cake, pipe another dam of vanilla frosting, and fill with another cup of strawberry frosting.
- Repeat layers with the second layer of strawberry cake and another cup of strawberry frosting.
- Add the final layer of vanilla cake and frost the outside with the remaining vanilla frosting.
- Press the strawberry crunchies into the frosting and cover the entire cake immediately after frosting.
- Finish with swirls of vanilla frosting on top and garnish with fresh strawberries.
- Store the cake in an airtight container. It can be left at room temperature for a day but should be refrigerated after that.


