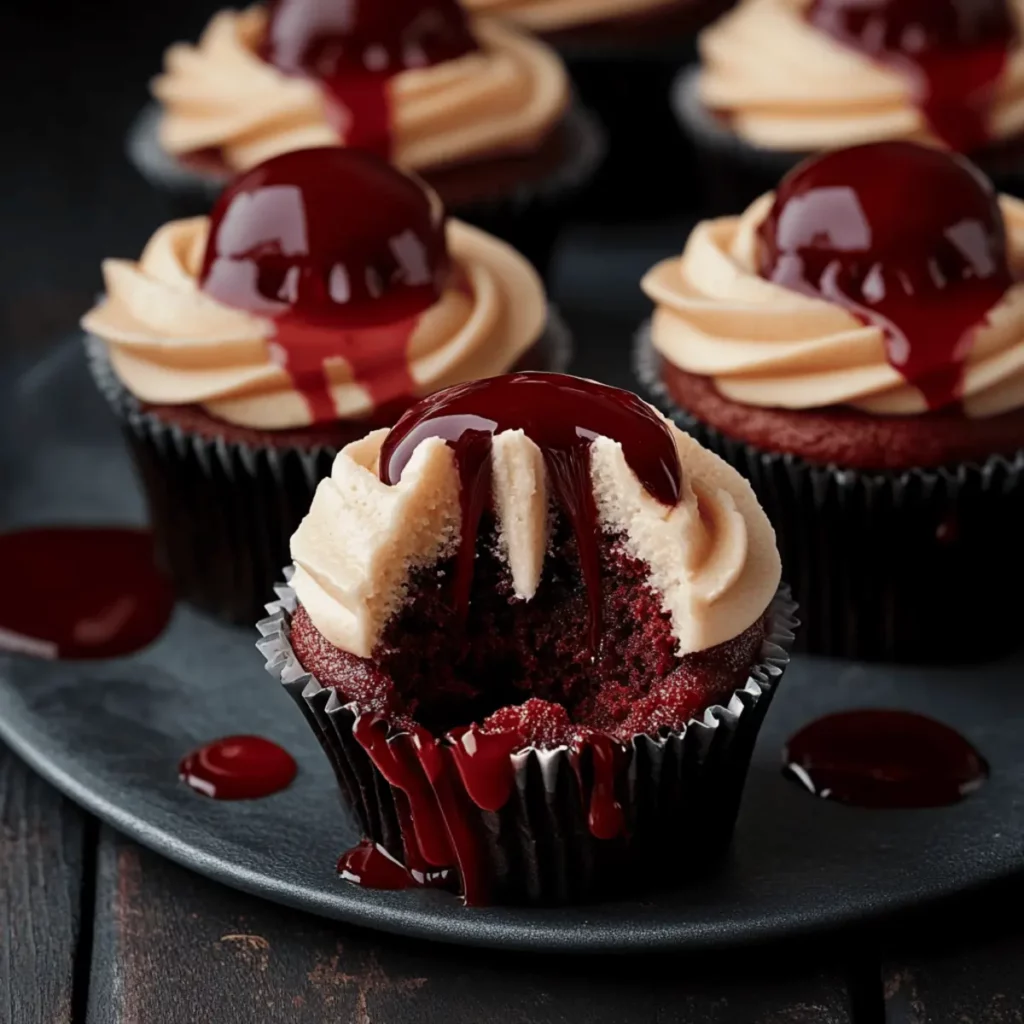
The chills of October are creeping in, and what better way to celebrate Halloween than with delightful creations that capture the spirit of the season? The Halloween Vampire Bite Cupcakes are not just cupcakes; they are little morsels of mischief. Picture fluffy, rich chocolate cupcakes with a surprise red velvet filling that’ll have your guests giggling nervously as they take their first bite.
Creating these treats is like weaving a spell in the kitchen. The vibrant colors and whimsical decorations make them a hit at any Halloween gathering. They bring together family and friends, all eager for a taste of the deliciousness, while also chuckling at their gory presentation. It’s time to get those aprons on and dive into cupcake magic.
Why You'll Love This Halloween Vampire Bite Cupcakes
- These incredible Halloween Vampire Bite Cupcakes transform simple everyday ingredients into restaurant-quality flavors that will blow your mind completely.
- Foolproof recipe techniques guarantee perfect results every single time, making even novice cooks feel like professional chefs instantly.
- Stunning visual appeal with gorgeous colors and mouthwatering aromas creates the ultimate Instagram-worthy dish for any special occasion.
- Endlessly adaptable for different dietary needs while working beautifully for meal prep, date nights, or entertaining large groups effortlessly.
Ingredients for Halloween Vampire Bite Cupcakes
Here’s what you’ll need to make this delicious Halloween Vampire Bite Cupcakes:
1 1/2 cups all-purpose flour: The base of your cupcakes, providing structure. Use a good quality flour for better texture.
1 cup granulated sugar: Adds sweetness, balancing the cocoa, and contributing to the cupcake’s soft texture.
1/2 cup unsalted butter, softened: For rich flavor and moistness, ensure it’s at room temperature for easy mixing.
2 large eggs: Bind the ingredients together and add richness. Always use fresh eggs for best results.
1/2 cup buttermilk: Enhances moisture and gives a tender crumb texture. You can substitute with regular milk and a bit of vinegar if needed.
2 tbsp cocoa powder: Provides that lovely chocolate flavor. Use unsweetened cocoa for the best balance.
1 tbsp red food coloring (gel-based): For that dramatic color effect; gel-based coloring gives better results than liquid.
1 tsp vanilla extract: Adds depth and enhances the flavor profile of the cupcakes.
1/2 tsp baking soda: Helps the cupcakes rise, giving them that fluffy texture.
1 tsp white vinegar: Reacts with the baking soda to provide lift and fluffiness in the cupcakes.
1/4 tsp salt: Balances the sweetness and enhances all the flavors.
1/2 cup red velvet cake crumbs: From the centers, these will be the surprise filling that adds flavor and texture.
1/3 cup sweetened condensed milk: Makes for a rich, creamy filling with sweet notes.
1 tbsp unsalted butter, melted: Boosts the filling’s richness and integrates the components.
1-2 tbsp red food coloring: To deepen the red hue of the filling, making it truly stand out.
1 cup unsalted butter, softened: The main ingredient for the frosting, contributing towards a fluffy texture.
3-4 cups powdered sugar, sifted: Adds sweetness and structure to your frosting. Adjust based on taste preferences.
2-3 tbsp milk or heavy cream: To achieve the desired consistency for your frosting.
A few drops of ivory or peach food coloring: Gives the buttercream a skin-tone color for a creepy effect.
Candy fangs or small dots of red gelatin: For the bite marks that make these cupcakes so fun and thematic.
Red syrup or edible red gel: To create delightful “blood” drips that add a gruesome touch.
Straws: Useful for creating a fun and spooky serving presentation.
How to Make Halloween Vampire Bite Cupcakes
Follow these simple steps to prepare this delicious Halloween Vampire Bite Cupcakes:
Step 1: Preheat and Prep
Preheat your oven to 350°F (175°C) and line a 12-cup muffin tin with paper liners. This simple step is essential for that perfect cupcake shape.
Step 2: Cream the Butter and Sugar
In a large mixing bowl, cream together the softened butter and sugar until light and fluffy—approximately 2-3 minutes. Add the eggs one at a time, beating well after each addition. Mix in the vanilla extract and red food coloring to set the mood.
Step 3: Mix Dry Ingredients
In a separate bowl, whisk together the flour, cocoa powder, baking soda, and salt. Gradually incorporate these dry ingredients into the wet mixture, alternating with the buttermilk, until everything is just combined. Try not to overmix—we want it fluffy, not tough!
Step 4: Bake the Cupcakes
Fill each muffin cup about two-thirds full with batter and bake for 18-20 minutes, or until a toothpick inserted into the center comes out clean. Once baked, let your cupcakes cool in the pan for 5 minutes before transferring them to a wire rack.
Step 5: Prepare the Filling
In a small bowl, combine the red velvet cake crumbs with the sweetened condensed milk and melted butter. Add red food coloring until you reach a vibrant, blood-red hue for your filling. The mix should be smooth and slightly glossy—just like your favorite vampire under moonlight.
Step 6: Fill the Cupcakes
Once the cupcakes are cool, use a small knife or cupcake corer to remove a small section from the center of each cupcake. Fill these holes generously with the creamy red velvet filling you just made.
Step 7: Whip Up the Frosting
In another mixing bowl, beat the softened butter until creamy. Gradually add the sifted powdered sugar, one cup at a time. Then add the vanilla extract and enough milk or cream to achieve a sinfully smooth and fluffy consistency. Adjust with food coloring to get that perfect pale skin-tone glow.
Step 8: Decorate Your Cupcakes
Frost each cupcake generously with the pale buttercream. Use candy fangs or red gelatin drops to create your spooky puncture marks. Finish by drizzling the red syrup or edible gel from those puncture marks to make delicious-looking “blood” drips.
Arrange your beautifully terrifying cupcakes on a serving platter, surrounded by additional syrup drips. What a perfect treat for a frightful Halloween gathering! Enjoy the screams of delight from your friends as they experience these decadent Halloween Vampire Bite Cupcakes!

You Must Know About Halloween Vampire Bite Cupcakes This showstopping Halloween Vampire Bite Cupcakes delivers restaurant-quality results using simple ingredients you probably already have at home. The perfect balance of textures and flavors creates an unforgettable dining experience that will have everyone asking for seconds. Picture-perfect presentation with vibrant colors makes this dish absolutely Instagram-worthy and guaranteed to impress any dinner guest. Incredibly versatile recipe that works beautifully for weeknight dinners, meal prep, special occasions, or even outdoor entertaining sessions.
Perfecting Halloween Vampire Bite Cupcakes Cooking Process
Start by creaming the butter and sugar, then beat in the eggs. After that, whisk the dry ingredients separately before gradually combining them with the wet mix. Lastly, fill and bake the cupcakes while you prepare the spooky filling.
Add Your Touch to Halloween Vampire Bite Cupcakes
Feel free to swap butter with coconut oil for a dairy-free version or play with flavors by adding orange zest. You can also experiment with different fillings, like chocolate ganache or berry compote, to keep things exciting.
Storing & Reheating Halloween Vampire Bite Cupcakes
Store leftover Halloween Vampire Bite Cupcakes in an airtight container at room temperature for up to three days. For longer storage, refrigerate them for up to a week or freeze for up to two months—simply thaw and enjoy.
Chef's Helpful Tips for Halloween Vampire Bite Cupcakes
- This professional-quality Halloween Vampire Bite Cupcakes relies on precise timing and temperature control to achieve restaurant-standard results consistently.
- Master the art of mise en place by prepping all ingredients beforehand, ensuring smooth execution and preventing any last-minute cooking disasters.
- The secret lies in layering flavors throughout the cooking process rather than seasoning only at the end for maximum depth.
- Pro tip: let the finished dish rest for optimal texture and flavor development before serving to hungry guests waiting eagerly.
Sharing these Halloween Vampire Bite Cupcakes with my friends sparked a mini-competition to see who could create the best spooky decorations. The laughter and deliciousness made it a night to remember.

FAQs About Halloween Vampire Bite Cupcakes
What are Halloween Vampire Bite Cupcakes?
Halloween Vampire Bite Cupcakes are delightful, spooky treats perfect for your Halloween celebrations. These cupcakes are velvety and rich, featuring a vibrant red filling that mimics the look of “blood.” Topped with pale buttercream and adorned with candy fangs or red gelatin, these cupcakes not only look impressive but taste incredible too. Whether for a party or a family gathering, they will surely be the star of the dessert table!
How do I store Halloween Vampire Bite Cupcakes?
To keep your Halloween Vampire Bite Cupcakes fresh, store them in an airtight container at room temperature for up to three days. If you want to enjoy them for a longer period, you can refrigerate them for up to a week or freeze them for up to two months. Just remember to let them thaw completely before biting into these spooky delights. Proper storage ensures that the flavors remain fresh and delicious.
Can I customize Halloween Vampire Bite Cupcakes?
Absolutely! You can get creative with your Halloween Vampire Bite Cupcakes. For a unique twist, consider swapping out the filling with chocolate ganache or berry compote. You can also try using different food colorings to achieve vivid designs or experimenting with flavors like orange zest for an exciting surprise. These changes make each batch personal and allow you to impress your family and friends with your originality.
How many cupcakes does this recipe make?
This recipe yields 12 Halloween Vampire Bite Cupcakes, making it perfect for sharing with friends and family at your Halloween gatherings. If you have more guests or wish to enjoy them yourself over the next few days, simply double the recipe! The deliciousness of these cupcakes ensures that they won’t last long, so you may want to make an extra batch just in case.
Conclusion for Halloween Vampire Bite Cupcakes
In summary, Halloween Vampire Bite Cupcakes are an ideal treat for adding a festive touch to your celebrations. With their eye-catching appearance and delicious flavors, they are sure to create lasting memories. From the rich cupcake base to the spooky decorations, every element of these cupcakes aims to impress. Make these Halloween Vampire Bite Cupcakes a staple for your fall festivities, and enjoy delighting your guests with every delectable bite!
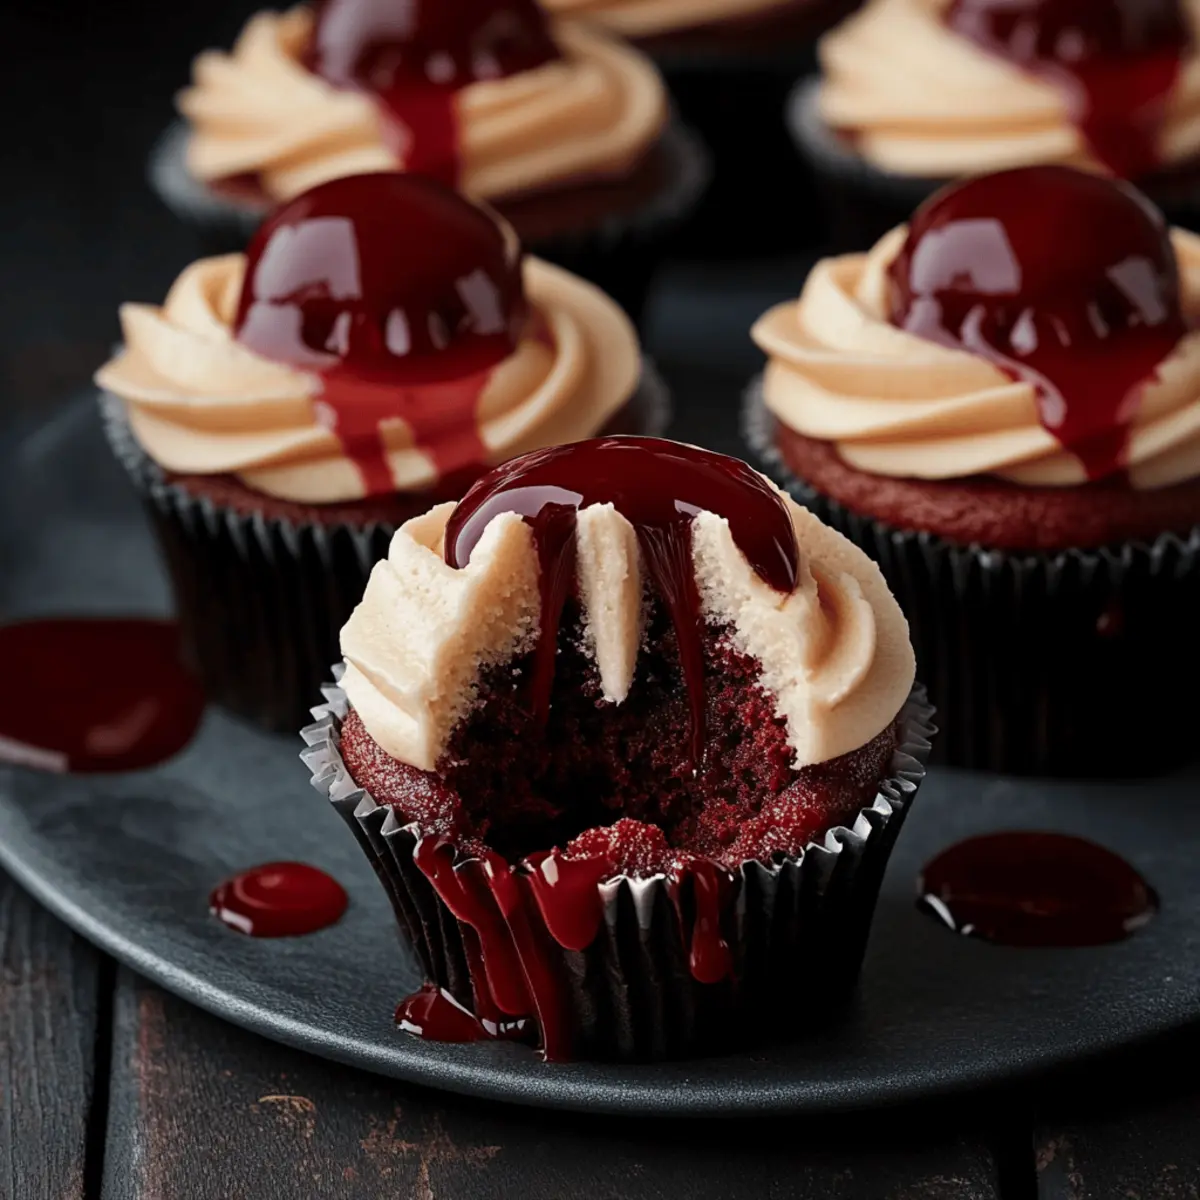
Delicious Halloween Vampire Bite Cupcakes with Creepy Blood Drips
Ingredients
Equipment
Method
- Preheat your oven to 350°F (175°C) and line a 12-cup muffin tin with paper liners. In a large mixing bowl, cream together the softened butter and sugar until light and fluffy, about 2-3 minutes. Add the eggs one at a time, beating well after each addition. Mix in the vanilla extract and red food coloring.
- In a separate bowl, whisk together the flour, cocoa powder, and salt. Gradually add the dry ingredients to the wet mixture, alternating with the buttermilk, until just combined. Stir in the baking soda and vinegar mixture. Spoon the batter into the prepared muffin tin, filling each cup about 2/3 full. Bake for 18-20 minutes, or until a toothpick inserted comes out clean. Let cool in the pan for 5 minutes before transferring to a wire rack.
- In a small bowl, combine the red velvet cake crumbs with the sweetened condensed milk and melted butter. Add red food coloring to achieve a vibrant red filling. The mixture should be smooth and slightly glossy.
- Once the cupcakes are completely cool, use a small knife or cupcake corer to remove a small section from the center of each cupcake. Fill each hole with the creamy red velvet filling.
- In a large bowl, beat the softened butter until creamy. Gradually add the powdered sugar, one cup at a time. Add the vanilla extract and 2 tablespoons of milk or cream, beating until smooth and fluffy. Add food coloring to achieve a pale skin-tone color.
- Frost each cupcake with the pale buttercream using an offset spatula or piping bag, ensuring a smooth surface.
- Use candy fangs or red gelatin drops to create puncture marks on the cupcakes. Drizzle red syrup or edible gel from the puncture marks to create 'blood' drips.
- Arrange the decorated cupcakes on a serving platter, surrounding them with additional red syrup drips.


